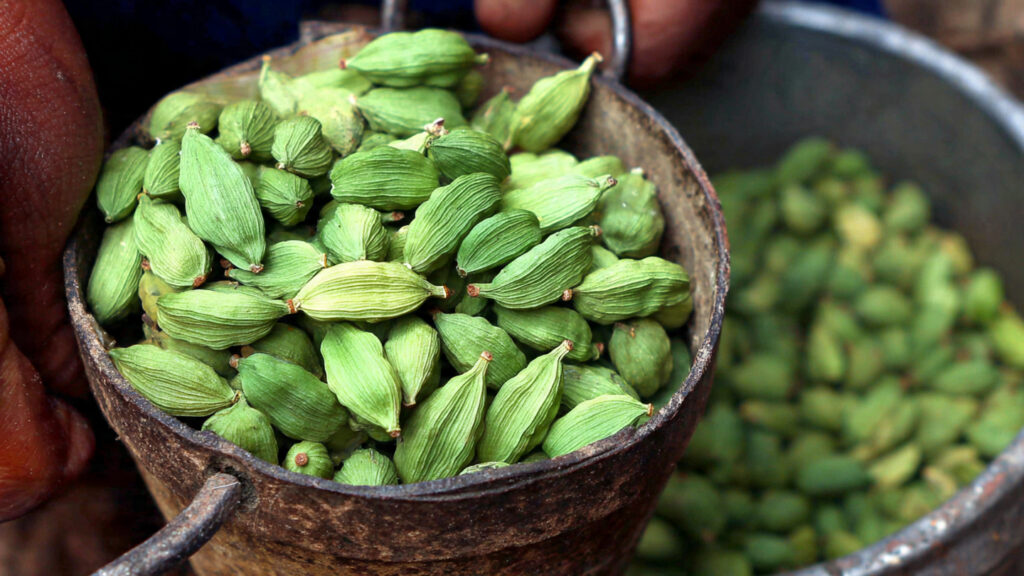
Cardamom, often called the “queen of spices,” is renowned for its aromatic flavor and numerous culinary and medicinal uses. From spicing up your morning coffee to adding a fragrant touch to desserts and curries, cardamom pods are indispensable in many kitchens. Growing your own cardamom plant at home is not only rewarding but also ensures a fresh supply of high-quality, organic spices at your fingertips. With the right guidance, anyone can cultivate this tropical delight in a home garden, balcony, or even indoors.
This comprehensive guide will walk you through the step-by-step process of growing cardamom at home—from selecting seeds to harvesting pods—so you can enjoy a fragrant and productive plant year after year.
Understanding Cardamom and Its Growth Requirements
Cardamom (Elettaria cardamomum) is a tropical perennial plant that thrives in warm, humid conditions with filtered sunlight. Native to the rainforests of India and Sri Lanka, it prefers shaded areas and well-draining soil rich in organic matter. Before you start, it’s essential to understand the plant’s natural habitat:
- Temperature: Cardamom grows best between 65°F and 95°F (18°C–35°C).
- Humidity: High humidity is vital for healthy growth; misting can help if grown indoors.
- Light: Prefers partial shade; direct harsh sunlight can scorch leaves.
- Soil: Moist, fertile, slightly acidic soil with good drainage is ideal.
By recreating these conditions at home, you can mimic the tropical environment that cardamom thrives in, giving your plant the best chance of producing aromatic pods.
Step 1: Selecting the Right Cardamom Seeds or Seedlings
You can grow cardamom from seeds or seedlings. Each method has its pros and cons:
- Seeds: Fresh, viable seeds offer the advantage of nurturing the plant from its very beginning, but germination can be slow, taking 3–6 weeks. Always choose seeds from healthy, mature cardamom pods.
- Seedlings: Purchasing seedlings from a reputable nursery can save time and increase the chances of success, especially for beginners.
Whichever method you choose, ensure the seeds or seedlings are disease-free and vigorous.
Step 2: Preparing the Planting Medium
Cardamom requires a soil mix that is rich in nutrients, retains moisture, yet drains well. A perfect home-growing mix includes:
- 2 parts garden soil or loam
- 1 part compost or well-rotted manure
- 1 part sand or perlite for drainage
If planting in pots, make sure the container has sufficient drainage holes to prevent waterlogging, which can cause root rot.
Step 3: Germinating Cardamom Seeds
If using seeds, follow these steps for successful germination:
- Soak the Seeds: Place the seeds in warm water for 24–48 hours. This softens the seed coat and speeds up germination.
- Sow Seeds: Plant the seeds 0.5 inches deep in seed trays or small pots filled with the prepared soil mix.
- Maintain Warmth and Moisture: Keep the soil consistently moist (not soggy) and maintain a temperature of around 75°F–85°F (24°C–29°C).
- Provide Indirect Light: Place trays in a bright, shaded area. Avoid direct sunlight at this stage.
Germination can take 3–6 weeks, so patience is key. Once seedlings develop 2–3 true leaves, they’re ready for transplantation.
Step 4: Transplanting Seedlings or Young Plants
After the seedlings have grown sufficiently, transplant them into larger pots or your garden. Follow these steps:
- Choose the Location: A partially shaded spot is ideal. Avoid areas with direct harsh sunlight.
- Spacing: Cardamom plants can grow up to 4–6 feet tall. Plant them at least 2–3 feet apart to allow adequate air circulation.
- Planting Depth: Place the seedling so that the soil level of the plant remains the same as it was in the nursery pot. Firm the soil gently around the roots.
- Watering: Water thoroughly after transplanting to help settle the soil and reduce transplant shock.
If planting in pots, ensure the container is large enough to accommodate growth, ideally 12–18 inches deep.
Step 5: Caring for Cardamom Plants
Proper care is essential for healthy growth and pod production. Here are the key aspects:
Watering
Cardamom prefers consistently moist soil. Water the plant regularly, ensuring the soil never dries out completely. Avoid overwatering, which can cause root rot.
Mulching
Apply a thick layer of organic mulch around the base of the plant. Mulching helps retain soil moisture, regulate temperature, and prevent weeds.
➡️ How to Grow Malabar Spinach from Cuttings for Fast, Easy Greens
➡️ How to Grow Super Delicious Cabbage at Home Without a Garden
➡️ How to Grow Bean Sprouts at Home in Plastic Bottles Easily (Step‑by‑Step Guide)
➡️ Why is Your Lemon Tree Blooming in the Heart of Winter?
➡️ Why Should Your Garden Have a Dedicated Pollinator Highway?
➡️ Why Do Your Fruit Trees Need a Winter Wash to Thrive in Spring?
➡️ How Can Rice Water Transform Your Fruits into Sweeter Delights?
➡️ Jumpstart Your Winter Garden: Seed Starting Under Lights
Fertilizing
Feed your cardamom plant every 6–8 weeks with a balanced organic fertilizer or compost tea. During active growth phases, additional nitrogen-rich fertilizers can boost leafy growth.
Pruning
Prune any dead or damaged leaves to encourage healthy growth and improve air circulation. Pruning also helps focus the plant’s energy on producing flowers and pods.
Step 6: Flowering and Pollination
Cardamom plants produce delicate, pale greenish-white flowers, which eventually develop into aromatic pods. Flowering usually begins after 2–3 years when grown from seeds.
- Flowering Season: Cardamom flowers bloom mainly during the monsoon or warm months, depending on your local climate.
- Pollination: While cardamom flowers can self-pollinate, hand pollination or the presence of bees can increase pod production.
Step 7: Harvesting Cardamom Pods
Harvesting is the most rewarding part of growing cardamom at home. Here’s how to do it:
- Timing: Cardamom pods are ready to harvest when they turn green and plump but before they start turning yellow.
- Method: Gently twist and pluck the pods from the plant. Avoid pulling too hard to prevent damaging the plant.
- Frequency: Multiple harvests can occur over the growing season, as cardamom plants continuously produce flowers and pods.
After harvesting, pods can be used fresh or dried for later use. Proper drying in a shaded, ventilated area helps preserve the aroma and flavor.
Step 8: Propagating Cardamom Plants at Home
To expand your cardamom garden, you can propagate new plants from rhizomes (underground stems):
- Select Healthy Rhizomes: Look for plump, disease-free rhizomes from mature plants.
- Plant in Soil: Place rhizomes horizontally about 2–3 inches deep in nutrient-rich soil.
- Water and Shade: Keep the soil moist and provide partial shade. New shoots will appear in 4–6 weeks.
Propagation via rhizomes is faster than growing from seeds and ensures the new plants inherit the traits of the parent plant.
Common Problems and How to Solve Them
- Yellowing Leaves: Usually caused by nutrient deficiency or overwatering. Apply balanced fertilizer and check drainage.
- Pests: Spider mites, aphids, and thrips may attack leaves. Use organic insecticidal soap or neem oil.
- Fungal Diseases: High humidity and poor air circulation can cause leaf spots or root rot. Ensure proper spacing, prune regularly, and avoid waterlogging.
With proper care, most cardamom problems are easily preventable and manageable at home.
Benefits of Growing Cardamom at Home
- Fresh, Aromatic Spices: Homegrown cardamom offers superior aroma and flavor compared to store-bought pods.
- Health Benefits: Cardamom is known for aiding digestion, boosting immunity, and improving oral health.
- Sustainable and Cost-Effective: Growing at home reduces reliance on commercial spices, cutting down costs and packaging waste.
- Decorative Plant: Cardamom’s lush green foliage and delicate flowers make it an attractive addition to home gardens and indoor spaces.
Conclusion
Growing a cardamom plant at home is a delightful journey that combines gardening with culinary rewards. By following this step-by-step guide—from selecting seeds or seedlings, preparing the soil, and providing proper care to harvesting aromatic pods—you can enjoy fresh cardamom all year round.
Whether you have a small balcony, a spacious backyard, or an indoor garden, cardamom can thrive with the right conditions. With patience and consistent care, your homegrown cardamom plant can become a continuous source of flavor, aroma, and natural wellness for years to come.
Start today, nurture your plant with love and attention, and savor the satisfaction of growing one of the world’s most cherished spices right at home.