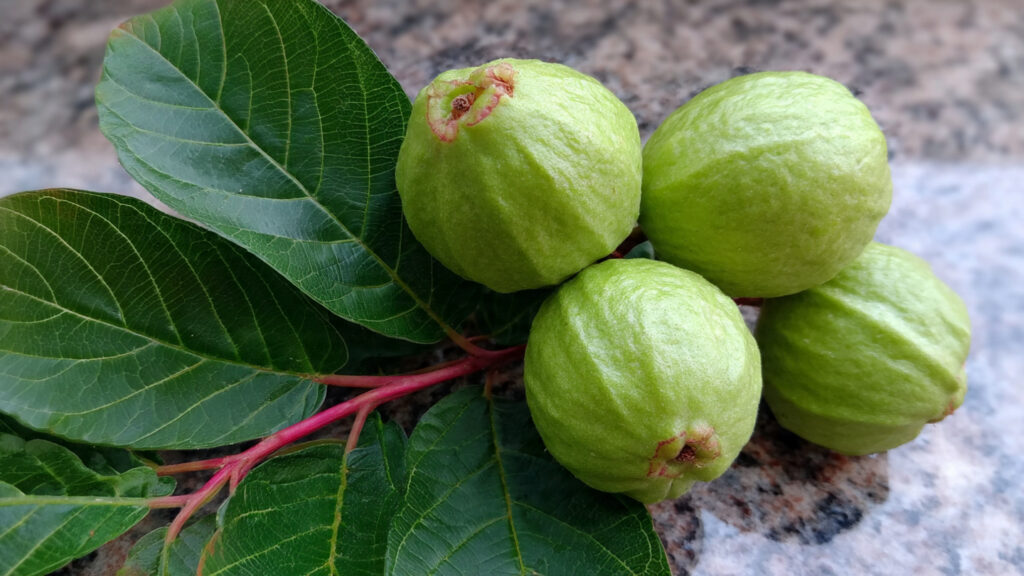
Guava is one of the most rewarding fruit trees you can grow at home. Its sweet, aromatic fruits are rich in vitamin C, fiber, and antioxidants, making it both delicious and nutritious. While many gardeners start guava from seeds, growing guava from cuttings is a much faster and more reliable way to produce fruit—especially if you want to enjoy harvests sooner rather than later.
The common guava, scientifically known as Psidium guajava, adapts well to tropical and subtropical climates and can even be grown successfully in large containers. If you want quicker fruiting and a plant identical to the parent tree, propagation from cuttings is the ideal method.
In this comprehensive guide, you’ll learn the easy, step-by-step method to grow guava from cuttings and speed up fruit production at home.
Why Grow Guava from Cuttings Instead of Seeds?
Before diving into the method, it’s important to understand why cuttings are often better than seeds.
1. Faster Fruit Production
Seed-grown guava trees can take 3–5 years to bear fruit. Cuttings, however, can begin fruiting within 1–2 years under good conditions.
2. True-to-Type Plant
Seeds may produce plants that differ from the parent tree in fruit size, flavor, or yield. Cuttings guarantee identical characteristics.
3. Space Efficiency
If you’re growing in a container or small backyard, you want predictable growth and fruit quality.
For home gardeners looking for fast results, cuttings are the smart choice.
Best Time to Take Guava Cuttings
Timing significantly affects success rates.
- Late spring to early summer is ideal.
- Choose a healthy, mature tree during active growth.
- Avoid extreme heat or cold periods.
Warm temperatures encourage faster root development.
Selecting the Right Cutting
Choosing a healthy cutting is critical.
What to Look For:
- Semi-hardwood branch (not too soft, not too woody)
- Pencil-thick stem
- 6–8 inches long
- 3–4 healthy nodes
- Disease-free and pest-free
Avoid flowering branches, as they focus energy on blooms rather than root formation.
Use clean, sterilized pruning shears to prevent infection.
Preparing the Cutting Properly
Preparation improves rooting success dramatically.
Step 1: Trim the Leaves
Remove the lower leaves, leaving only 1–2 small leaves at the top. Large leaves can be cut in half to reduce water loss.
➡️ How to Grow Malabar Spinach from Cuttings for Fast, Easy Greens
➡️ How to Grow Super Delicious Cabbage at Home Without a Garden
➡️ How to Grow Bean Sprouts at Home in Plastic Bottles Easily (Step‑by‑Step Guide)
➡️ Why is Your Lemon Tree Blooming in the Heart of Winter?
➡️ Why Should Your Garden Have a Dedicated Pollinator Highway?
➡️ Why Do Your Fruit Trees Need a Winter Wash to Thrive in Spring?
➡️ How Can Rice Water Transform Your Fruits into Sweeter Delights?
➡️ Jumpstart Your Winter Garden: Seed Starting Under Lights
Step 2: Make a Clean Cut
Cut just below a node. Nodes are where roots are most likely to form.
Step 3: Slightly Wound the Base (Optional)
Lightly scrape the bark at the base to expose the cambium layer. This encourages faster rooting.
Step 4: Apply Rooting Hormone
Dip the bottom inch into rooting hormone powder or gel. Though optional, it significantly increases success rates.
If you prefer natural options, aloe vera gel or cinnamon powder can also help reduce fungal infections.
Choosing the Right Growing Medium
Guava cuttings need a light, well-draining medium to prevent rot.
Ideal Mix:
- 50% coco peat or peat moss
- 30% sand
- 20% compost or perlite
The goal is:
- Excellent drainage
- Good aeration
- Moderate moisture retention
Avoid heavy garden soil, as it holds too much water and may cause the cutting to rot.
Planting the Cutting
Follow these simple steps:
- Fill a small pot with the prepared medium.
- Make a hole with a stick or pencil.
- Insert the cutting 2–3 inches deep.
- Firm the soil gently around it.
- Water lightly to settle the soil.
Do not compact the soil too tightly—roots need air circulation.
Creating the Ideal Rooting Environment
Humidity and warmth are key to successful rooting.
Maintain High Humidity
- Cover the pot with a clear plastic bag.
- Use a plastic bottle dome.
- Keep it in a mini greenhouse.
This prevents the cutting from drying out before roots form.
Provide Indirect Sunlight
Place the pot in bright, indirect light. Avoid harsh direct sun, which can scorch the cutting.
Maintain Warm Temperature
Ideal temperature: 22–30°C (72–86°F)
Guava roots faster in warm conditions.
Watering During Rooting
Watering must be balanced.
- Keep the medium slightly moist.
- Never allow it to become soggy.
- Mist occasionally if the air is dry.
Overwatering is the most common reason for failure.
How Long Does It Take to Root?
Guava cuttings usually root in:
- 3–6 weeks under ideal conditions
Signs of successful rooting include:
- New leaf growth
- Resistance when gently tugged
- Healthy green leaves
Once new growth appears, gradually remove the humidity cover to harden the plant.
Transplanting to a Larger Pot or Garden
After strong root development:
Step 1: Harden Off
Gradually expose the plant to more sunlight over 7–10 days.
Step 2: Choose the Right Location
Guava prefers:
- Full sun (6–8 hours daily)
- Well-drained soil
- Slightly acidic to neutral pH
Step 3: Transplant Carefully
Avoid disturbing the root ball too much.
Water thoroughly after transplanting.
Growing Guava in Containers
Guava grows very well in pots, making it perfect for small spaces.
Container Tips:
- Use a 12–18 inch pot initially.
- Upgrade to 20–24 inch container as it grows.
- Ensure drainage holes.
- Use rich but well-draining soil.
Pruning helps keep the plant compact and manageable.
Encouraging Fast Fruit Production
To speed up fruiting:
1. Provide Full Sun
Guava needs strong sunlight for flower development.
2. Balanced Fertilization
Use organic compost or balanced fertilizer every 6–8 weeks.
Avoid excessive nitrogen, which promotes leaf growth instead of fruiting.
3. Regular Pruning
Prune lightly to encourage branching. Guava fruits on new growth.
4. Proper Watering
Keep soil consistently moist but not waterlogged.
With proper care, fruiting may begin within 12–24 months.
Common Problems and Solutions
1. Cutting Rotting
Cause: Overwatering or poor drainage.
Solution: Improve soil aeration and reduce watering.
2. Leaves Wilting
Cause: Low humidity.
Solution: Increase humidity during rooting phase.
3. Slow Growth After Rooting
Cause: Lack of nutrients or sunlight.
Solution: Provide balanced feeding and more light.
Benefits of Growing Guava at Home
- Fresh, chemical-free fruit
- High vitamin C content
- Beautiful evergreen foliage
- Fragrant flowers
- Suitable for container gardening
Homegrown guava tastes fresher and sweeter compared to store-bought fruit.
Final Tips for Success
- Always choose healthy parent plants.
- Avoid taking cuttings during extreme weather.
- Maintain warmth and humidity.
- Be patient—strong roots take time.
- Protect young plants from frost.
Consistency is key to success.
Conclusion
Growing guava from cuttings is an easy and highly effective way to enjoy fast fruit production at home. By selecting healthy semi-hardwood branches, using well-draining soil, maintaining humidity, and providing proper sunlight, you can successfully propagate guava and harvest delicious fruit much sooner than seed-grown trees.
Whether you have a spacious backyard or just a sunny balcony, this simple propagation method allows you to multiply your guava plants and enjoy fresh, homegrown fruit year after year.